Managing organization and workspace members
Details on how to invite users and accept invitations. Covers deleting, deactivating and editing organization users
Workspaces inside organizations can have more than one user, allowing you to track time alongside your team and providing them access the data they need.
Toggl Track free organizations allow up to 5 users, and upgrading to paid plans offers advanced features like team reporting and improved admin controls.
In this guide, we cover:
Organization and workspace users can be edited in the webapp. These actions cannot be done from mobile apps, desktop apps or Toggl Track Button.
Inviting Users to your Organization
When you create a new Organization, you will be prompted to invite team members, however, you can add users to your organization at any time.
Free organizations can have up to 5 users with basic collaboration features, while paid plans provide advanced tools for team reporting and better administrative controls.
To add users to your Organization, click on the Members button in the sidebar and click Invite Members.

If you have the multi-workspace functionality enabled you'll also be prompted to choose which workspaces to invite them to, and which access to provide them with.
Invited users (for the Organization) can be seen under the Show Invited users filter and invitations can be deleted from that view by using the 3-dot control. The invite expires after 30 days.
Accepting invites
The way that the invite is accepted depends on whether or not the invitee has a Toggl Track account or not.
Invited user doesn't have a Toggl Track account
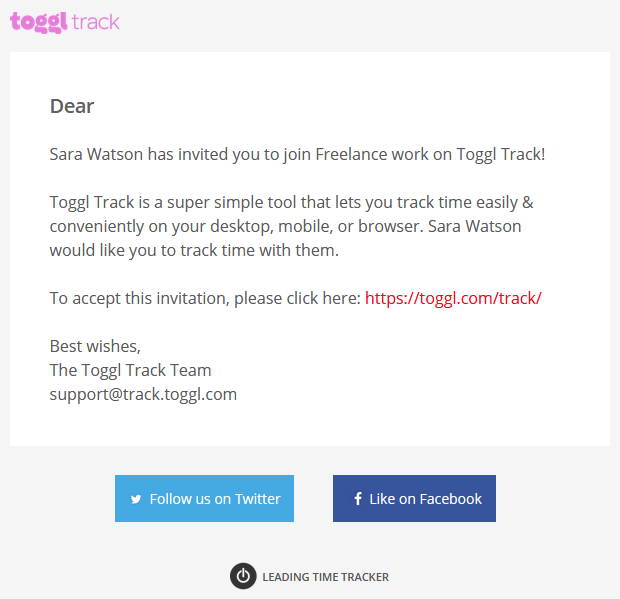
Click on the invitation link within the invitation email. Doing so will open Toggl Track and ask you to create a password and accept our TOS:

Clicking on the invitation link takes you to a page where you can create a password:

Invited user already has a Toggl Track account
Invitees who already have a Toggl Track account must accept the invitation through the web app. More specifically, via the notification centre. Click on the small bell icon in the bottom-left on the webapp to view all notifications.
Existing data in the user's account remains untouched and separate, ensuring no information is lost when accepting an invitation to join a new organization.

Editing Organization and Workspace Members
Organization users can be added and removed from the Members page. You can review active, inactive and invited users here, filter for users or search through them, view what workspace(s) they are a part of, change access rights and edit or deactivate them.
To edit an organization user's billable rate, visit the Members tab, and here, you can add in their billable rate and cost rate (Premium plans only) in the columns provided. If your Organization has multi-workspace setup, you can edit the rate for each workspace here by expanding the list.
You can also add a user's work hours here for use in the Workload Report.
For more details on how to manage users in your Organization and workspaces, read this guide.
When users join a new organization, their existing data from other organizations remains distinct and unaffected. Toggl Track ensures no data merging between organizations. Users can easily switch between organizations via the selector in the app, keeping each organization's data siloed for better management.
Removing Organization or Workspace Members
Users can be removed from a workspace via the 3-dot control on the Members page, if they are a member of multiple workspaces, remove them from each one as needed.

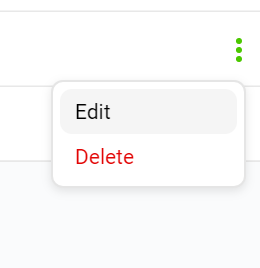
Organization users can be deactivated or deleted from the Members page via the 3-dot control present there. Either of these actions will remove a user from your subscription.
Here you can:
1. You can deactivate users
2. You can delete users.

What's the difference between deleting and deactivating a user?
Deactivating a user is a reversible action, you can choose to reactivate that same user at a later date. It also places them under the Inactive view on the Organization > Organization Members page. Inactive users are not counted for the purposes of calculating subscription costs.
Please note that neither deleting or deactivating users deletes their data (tracked time) but it is easier to find data for deactivated users. Delete user time loses its association with the person who tracked it. For this reason we recommend the deactivation of users, rather than deleting them
With deleted users you would need to use a special approach.
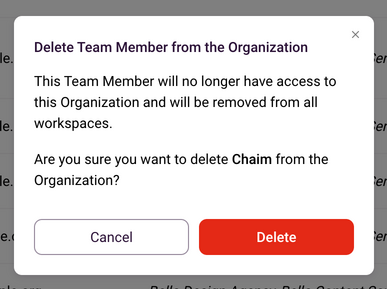
Deleting a user completely removes the user from the organization and is not a reversible action. In order to rejoin they need to be invited again. We recommend you use this only in cases where you're certain the user will never need to track time in your organization again and if you don't need to view their data in regular reports like you did while they were active in your organization, hence this warning will appear when you try to delete a user.

Re-activating users
Switch to the 'inactive' view on the Members page to see all deactivated users. Move your mouse over the three vertical dots on the far right of the name of the user you want to reactivate.

When a dropdown arrow appears, click on it and select Activate from the menu that appears.
Creating Groups
Groups are a great way to combine multiple users for easier use. Groups can be used to easily assign multiple users to a project, as well as filtering by group in the Reports tab. You can also bulk add users to a workspace via Groups.
To create a group simply switch over to the 'Groups' tab in the Admin Console and here you can add a new Group.
On the popup that opens:
-
Enter a Group name
-
Select which organization members to add to it
-
Select which workspace to add the group to
Editing and deleting groups:
While on the Groups tab simply click on the three vertical dots on the far right of a group's name to see additional options and select to edit or delete a group:

Clicking on 'Edit' will show that same popup the one that shows up when you start creating a group allowing you to change it's name and members:
Clicking on 'Delete' will show you a popup warning you how that will affect the users within the group and asking you to reconfirm your selection:
Reviewing Team Activity
Review recent time entries your team members have created on the Organization > Workspaces > Select Workspace > Activity tab. Only Admins can access this page unless the Workspace Setting for this is set to everyone.

View the most active team members in the last 7 days as well as review Activity by User or even the Last 20 time entries using the dropdown filter.
Frequently Asked Questions
The invitation link doesn't work. What do I do?
In these rare situations, it's best to ask an Administrator to cancel the invitation. They can do this on the Organization > Organization Members page, click the 3-dot control and choose Delete.
Afterward, create a Toggl Track account using the same email address, then ask the Administrator to invite the email address you used. You should now see the invitation when you log in.
If you still have questions about managing Organizations members, please contact our Support team by clicking on the purple chat icon in the bottom right corner of this page to start a chat.
Why are some inactive users grayed out on the Members page and others aren't?
This is a state which can occur in workspaces that have the multi-workspace functionality enabled.
-
User is greyed out - it means the user is deactivated in the entire organization. To reactivate them, click on the three-dots menu > Activate.
-
User is not greyed out, but there is (inactive) next to their name - it means the user is active in the organization, but inactive in the workspace you're currently viewing. You can deactivate them (in the Org) by clicking on the three-dots menu > Deactivate.