Managing Clients
Learn how to create, edit and delete clients in your workspace
Assigning Clients to your projects will allow you to get an extra level of time tracking data categorization and make it easier to create reports by applying both the Project and the Client filter.
If you work on different projects (or provide multiple services) for a single client, adding the same client to multiple projects will allow you to keep better track of the entire scope of work you are doing for that client.
Creating Clients
Workspaces on our Starter, Premium and Enterprise plans have an option to prevent regular users from managing Clients. If the option 'Who can create projects and clients' is set to 'Admins' under Workspace settings, only admins will be able to view, create, update or delete clients in that case.
Clients can be created in more than one way:
-
From the "Clients" page.
-
From the "Projects" page.
-
From the "Timer" page.
Creating Clients using the "Clients" page
-
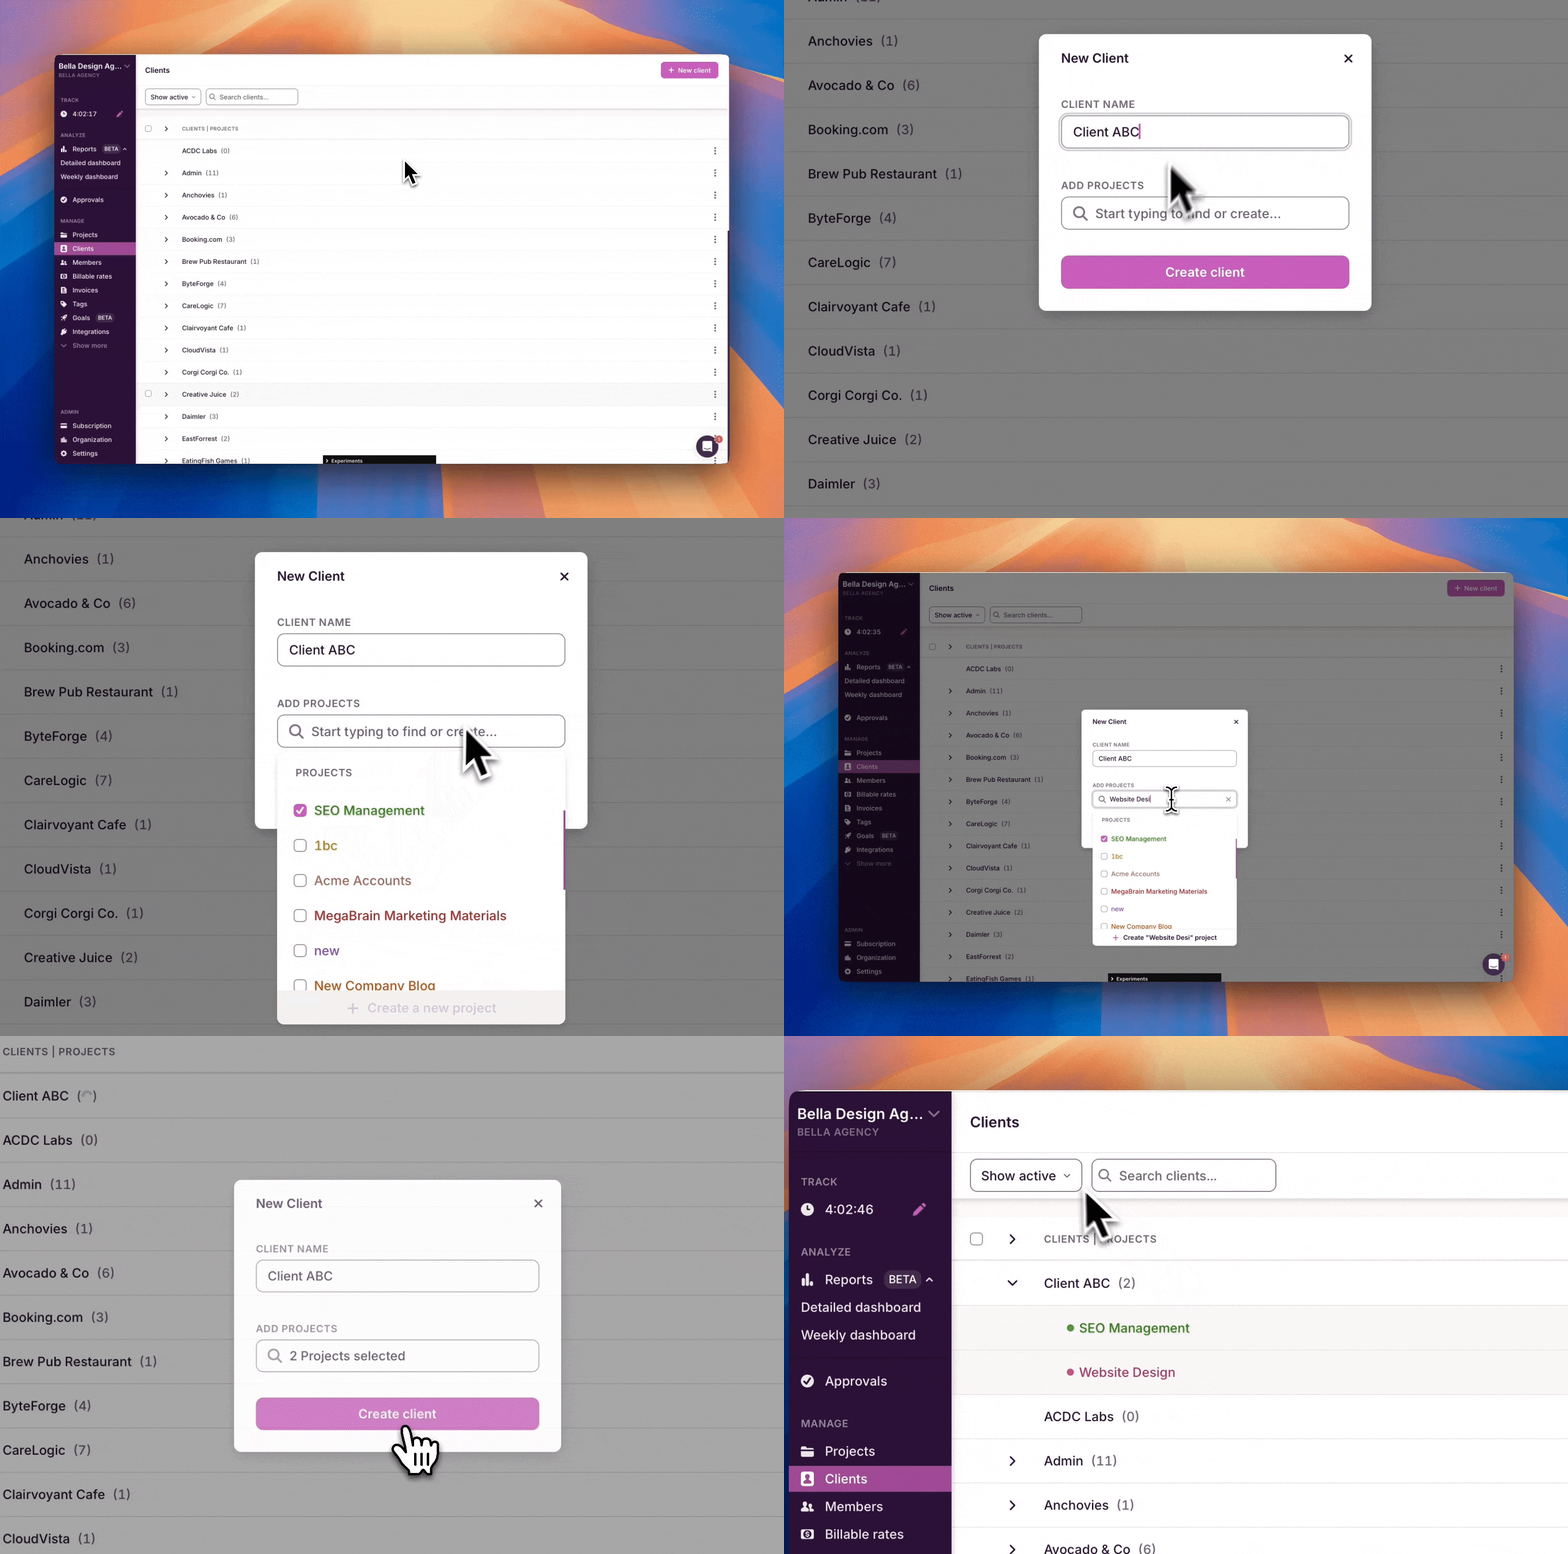
Click on the "Clients" page on the left side menu in the Toggl Track web app.
-
Click on the "+ New client" in the top right corner
-
Type the name of your new client in the "Client name..." box and click the pink "Create" button. You can also assign existing projects, or create new projects for this client from here.
Creating clients while creating projects on the "Projects" page
-
Go to the "Projects" page using the left side menu via the Toggl Track web app
-
Start creating a project by clicking on the pink "+ New project" button on the upper-right corner of your screen
-
An overlay will pop up. Click on "Advanced options”.
-
Use the "Client" field to search for existing clients or add a new one.

Creating a new client while creating a new time entry
-
Start a running timer on the Timer page or start creating a new time entry using manual mode
-
When selecting a project, choose to create a new Project
-
An overlay will pop up. Click on "Advanced options”.
-
Use the "Client" field to search for existing clients or add a new one.
Editing Clients
To edit clients, click the 3-dot control next to the Client and choose Edit. This will trigger a modal window where you can modify the client name.

You can also assign more projects to this client from this modal.
Archiving Clients
This is only available on Premium or Enterprise plans.
You can archive a Client you no longer work with, while retaining the data for them in your reports. Open the Clients page, and use the 3-dot control next to a client to Archive it:

Archiving a Client will also archive any Projects associated with this client. You can still run reports for this Client and their Projects in reports.
You can view all Clients (Archived and Active) on the Clients page by choosing "Both" from the filter at the top, or choose to view just Active or Archived.

Archived Clients are shown in grey under the active Clients.

You can use the 3-dot control to restore an archived Client. At this time, you can choose whether you wish to just restore the Client or also the Projects associated with them.

Deleting clients
To delete clients, go to the "Clients" page using the left-side menu via the Toggl Track web app and click on the three dots next to the client you'd like to remove:

After clicking the "Delete" next to the Client you'd like to remove, you will be asked to confirm your decision. You can also choose to Archive the client instead.

Once you confirm that you'd like to delete a Client, there is no way to undo the action, and the client will be removed from all Projects it was allocated to.

You can also bulk archive and delete Clients from this page.

