Tags
Add additional information to your time entries with Tags. Learn how to create and manage them.
Tags allow you to add context to time entries, and you can use them to define what time entries are related to beyond a client and/or project. You can also pull reports based on tags by filtering your time entries by tags on the Reports page.
Creating and editing tags
Users can create and edit tags in various locations.
-
Tags can be created from the Tags page or the Timer page.
-
Tags can be edited and deleted from the Tags page.
On Premium plan organizations, admins can control who can create new Tags on the Settings page. You can choose whether only Admins or all users can create new Tags.
Managing tags from the Tags page
In your left menu bar, there is a Tags button or click here to go to the Tags page.
On this page, you can:
-
Create New Tag
To create a new tag on the Tags page, click on "+ New Tag" in the top right corner and type the name into the “Tag name” field and click “Create."
-
Edit a Tag
To edit a tag, click on its existing name and type in the changes.
-
Filter by Tags
Click the Tag Name filter and enter the keyword you want to filter for
-
Bulk Delete multiple Tags
Click on the Bulk Delete button and choose the Tags you want to delete.
-
Delete individual Tags
Hover at the end of the row of a Tag to view a trash icon you can use to delete it.

Creating tags from the Timer page
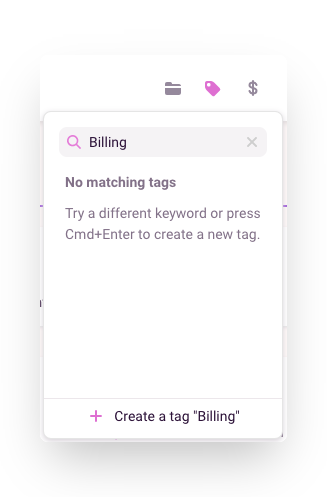
Click on the tag icon on your Timer and type in the name of the tag you’d like to create.
Press Cmd (Ctrl for PC) and Enter to create it. This new tag will also be applied to your current time entry.

Tags created on the Timer page will be allocated to the workspace you’re currently in, i.e., the one at the top left of the navigation sidebar.
Exporting tags
Tags can be exported via the Workspace Settings > Data Export page.