Toggl Track Browser Extension
Track time in Toggl Track without leaving your browser and the online apps you usually spend time on. Available for Chrome and Firefox.
Our browser extension (previously called Toggl Button) for Chrome, Edge and Firefox lets you track time in your favorite web tools and wherever you are on the web. The Toggl Track browser extension integrates with 100+ popular tools:
Airtable, Any.do, Asana, Assembla, Axosoft, Azure Devops, Backlog.jp, Basecamp, Bitbucket, Bitrix24, Breeze, BrokerEngine, BugHerd, Bugsnag, Bugzilla, CapsuleCRM, ClickUp, Cloudes.me, Clubhouse, Codeable, Codebase, Corgee, Crowdin, Desk.com, DevDocs, Dixa, Dobambam, Doit.im, DokuWiki, DOM Integration, Draftin, Dropbox Paper, Drupal, Dynamics 365, eProject.me, Esa, Eventum, Evernote, Fastmail, Feedly, Fibery, Focuster, FogBugz, Freshdesk, Gemini, Getflow, Gingkoapp, Gitea, Github, Gitlab, Gogs, Google Calendar, Google Docs, Google Inbox, Google Keep, Google Mail, GQueue, Habitica, HEFLO, Helprace, Help Scout, HubSpot, Husky Marketing Planner, Intercom, JIRA, Jquery Bugs, Kanbanist, Kanboard, Kantree, KhanAcademy, LiquidPlanner, Liquidplanner Next, LiveAgent, ManageEngine, MantisHub, MeisterTask, Microsoft Planner, miniCRM.pl, Newsletter2Go, Notion, Nozbe, Odoo, OnlyOffice, Onshape, OpenProject, osTicket, Outlook, PagerDuty, Pivotal Tracker, Placker, Planbox, Podio, ProcessWire, Produck, Protonmail, Proworkflow, RallyDev, Redbooth, Redmine, Remember The Milk, Reviewboard, Rindle, Rollbar, Salesforce, Salesforce Lightning, Scrapbox, Sentry, SherpaDesk, Shortcut, Sifterapp, Slack, SourceLair, Spidergap, Sprintly, Taiga, TargetProcess, Teamleader, Toggl Plan, Teamwork.com, TickTick, Todoist, Toodledo, Trac, Trello, Unfuddle, VisualStudio, VivifyScrum, WordPress, Workast, Workflowy, Workfront, Worksection, Wrike, Xero, YouTrack, Zammad, Zendesk, Zenhub, Zoho Books, Zube.
Please note: Toggl Track browser extension was previously called Toggl Button. Beyond the name and colors, no other changes have been made.
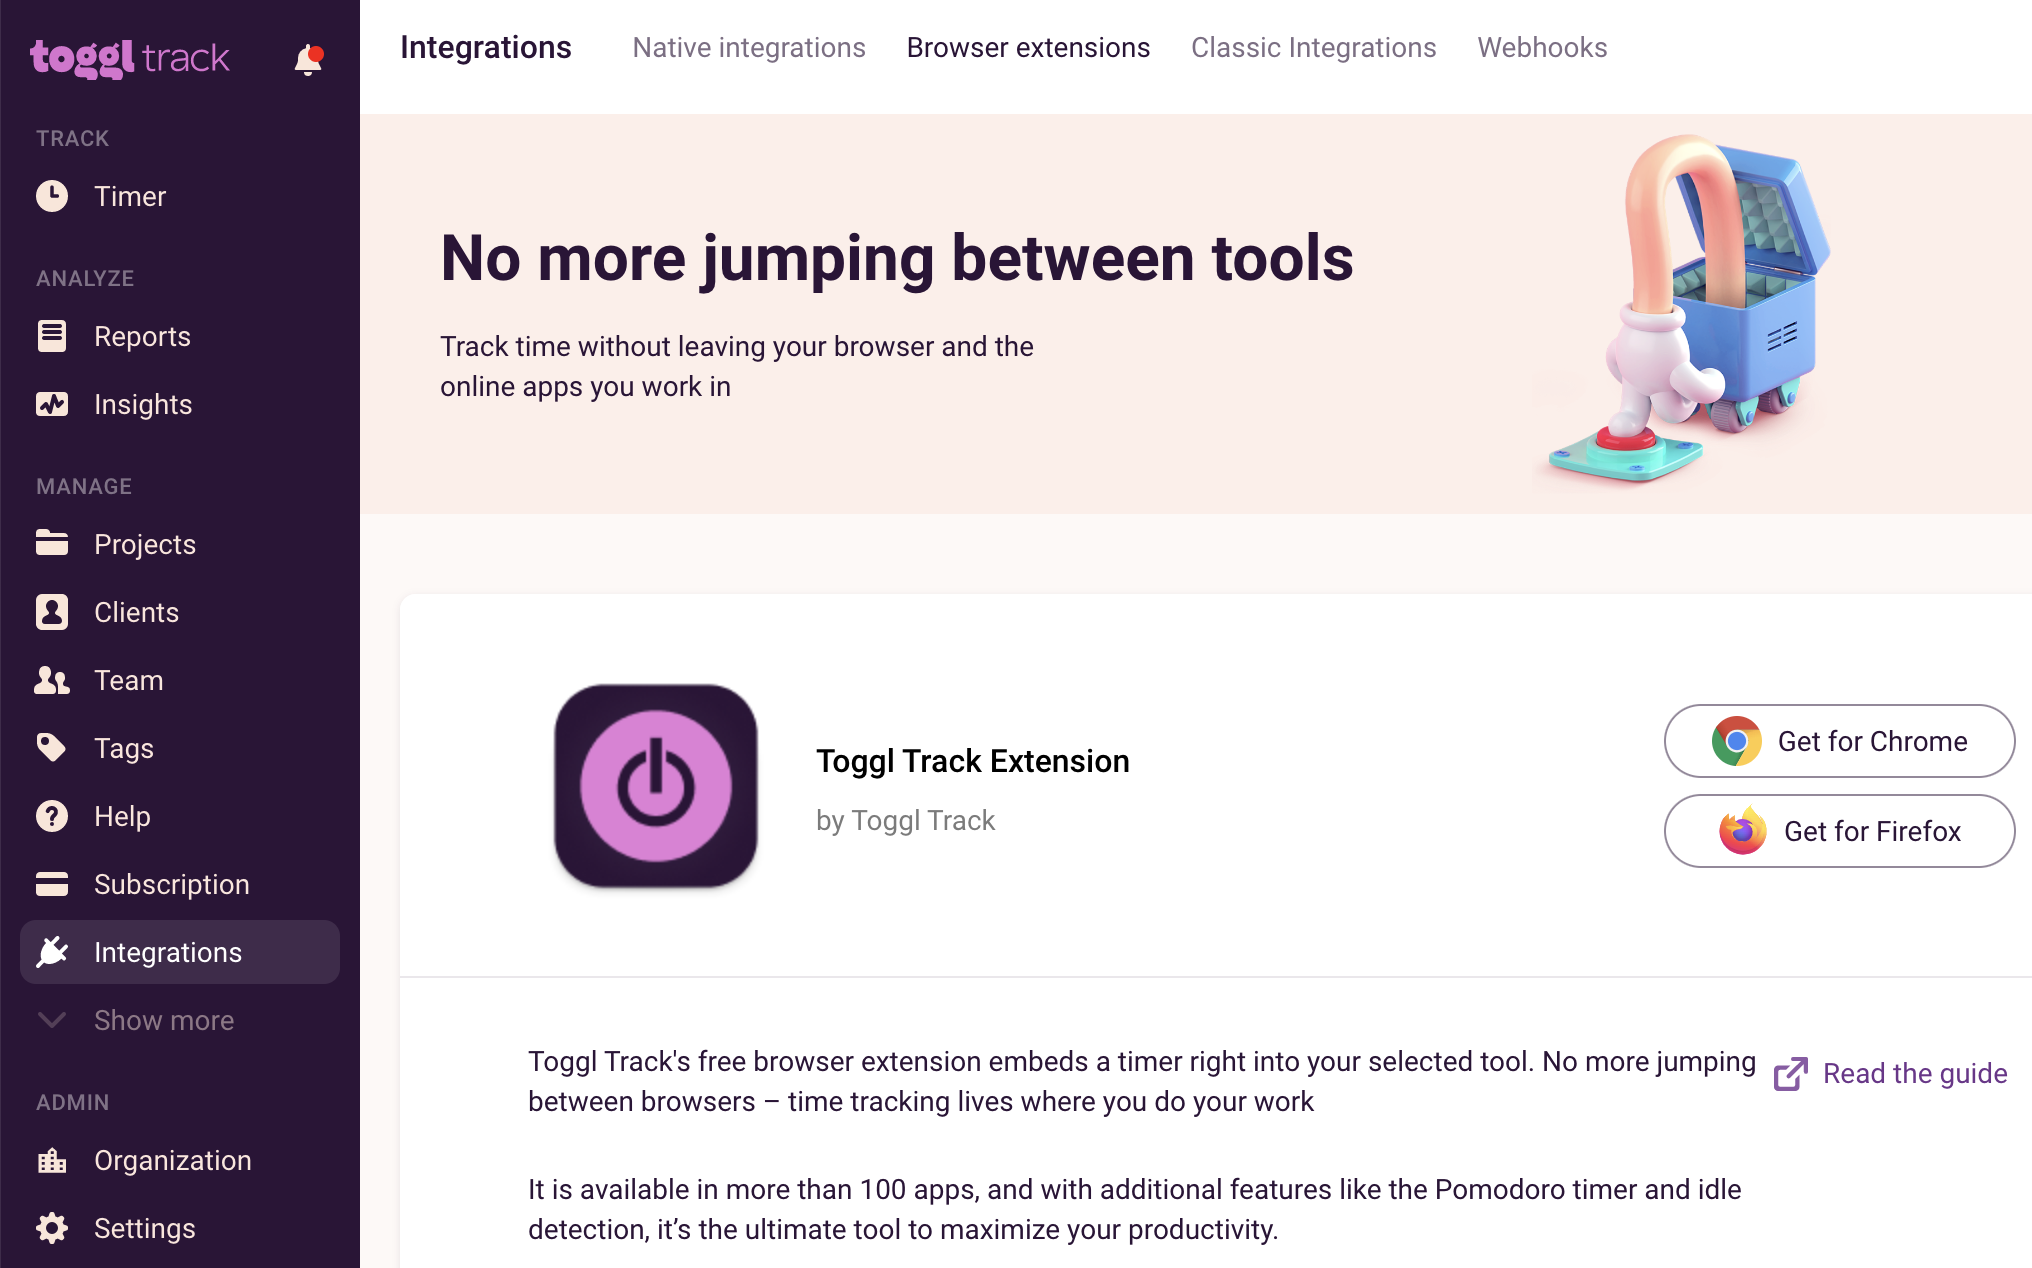
You can find the Browser Extension for both Google Chrome and Mozilla Firefox on our web application's integrations page, simply head over to Integrations on your navigation panel and click on the Browser extensions tab at the top.
Installing the Chrome extension
-
Open the Toggl Track browser extension in the Chrome Webstore.
-
Click “Add to Chrome”.
-
Click the button next to the address bar and log in with your Toggl Track account.
Installing the Firefox add-on
-
Open the Toggl Track browser extension inside the Firefox Add-on Store.
-
Click “Add to Firefox”.
-
Click the button next to the address bar and log in with your Toggl Track account.
Note:
Microsoft Edge (as well as other Chromium-based browsers) have support for Chromium extensions, so you can use the Toggl Track browser extension on those browsers by downloading it from the Chrome Store.
Toggl Track extension icon
Once you install the add-on, a Toggl Track icon will be added to the right of the address bar.
When the button is grey with a blue “x” it means you are currently not logged in.

When the button is plain grey it means you are not currently tracking time.

When the button is pink it means there is a time entry currently running.

Dropdown Timer
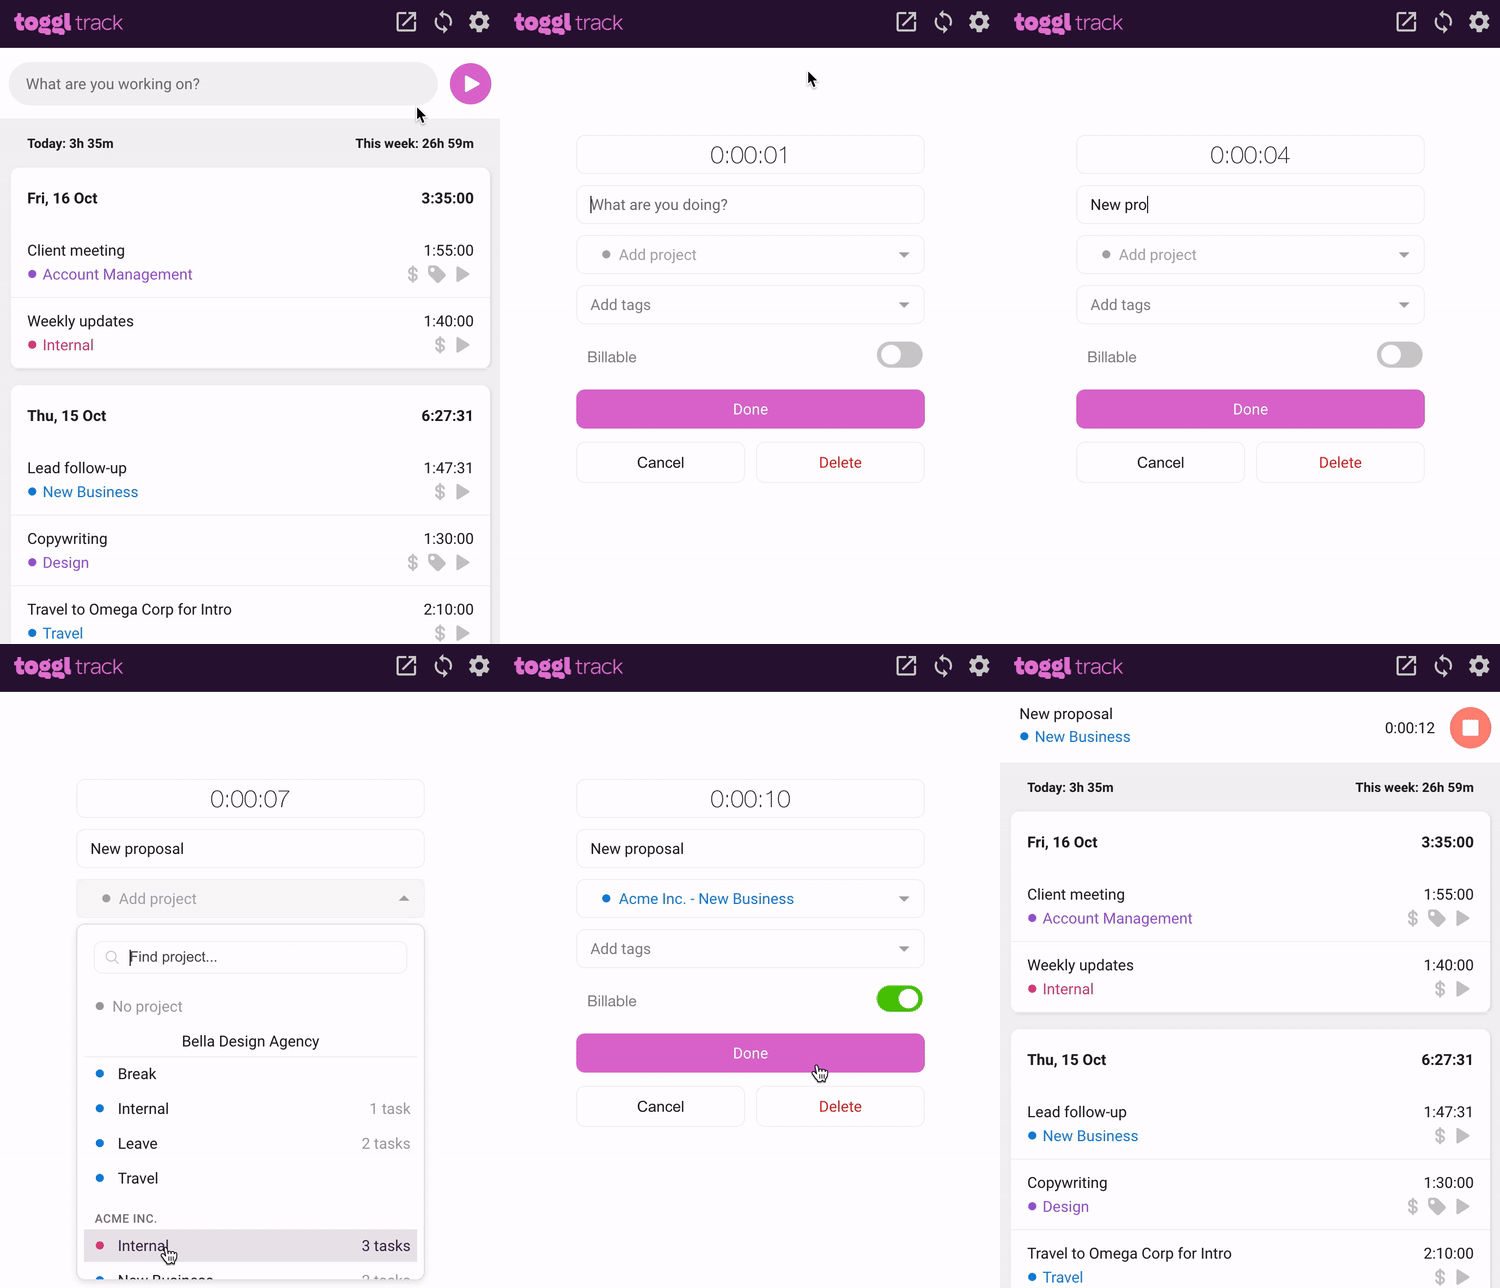
Click on the Toggl Track browser extension to reveal the timer’s dropdown. Here you can:
-
Click on the new window icon in the top right to open Track webapp
-
Go to the Settings menu via the Settings cog
-
Create a new time entry in timer or manual mode
-
See total time tracked for the day and week
-
See existing time entries for the past few days, and edit or delete them by clicking on them.

Editing a time entry
By clicking an existing entry or a running timer, you can edit its description, project, tags and billable status.
Click Done to save, Cancel to go back to the list and Delete to delete the time entry.
Start Timer Link
If the tool you’re using is integrated via the Toggl Track browser extension, you will see the “Start timer” link:

You can start a new Time Entry by clicking the link and it will copy the description of the item next to it.
Depending on the tool you’re using, the location of the “Start timer” icon will vary. You’ll likely find it within your tasks, issues, cards, to-dos, etc. You can see a few examples of where you can find the link here.
Tracking from any Text on the Web
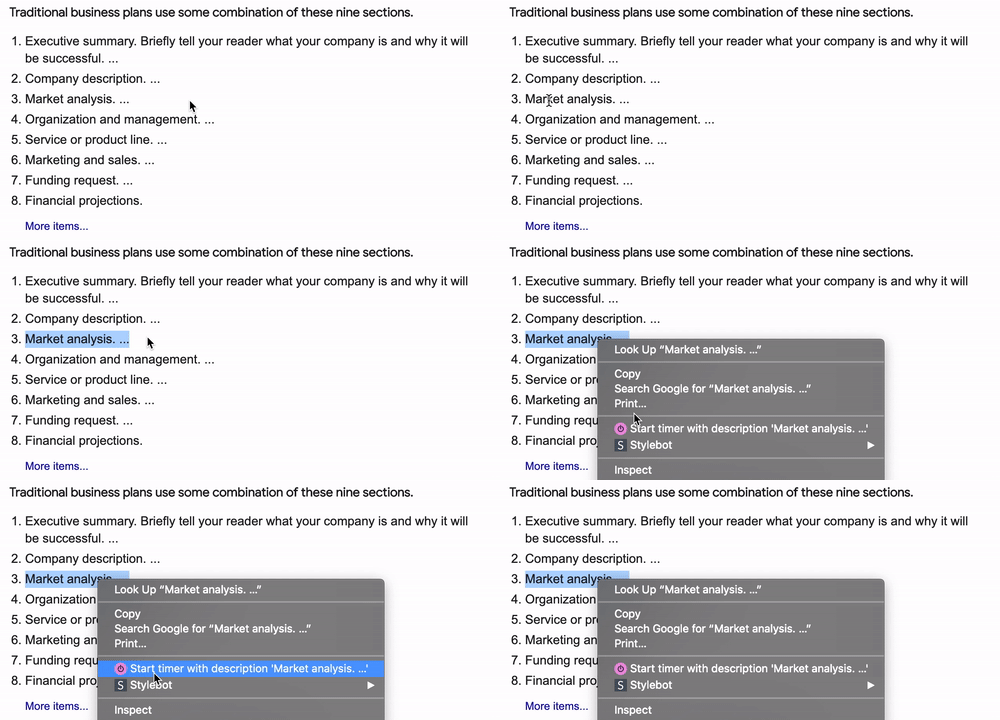
You can start a new Toggl Track Time Entry from any text on the web by selecting it and then clicking “Start timer with description” in the right-click menu.
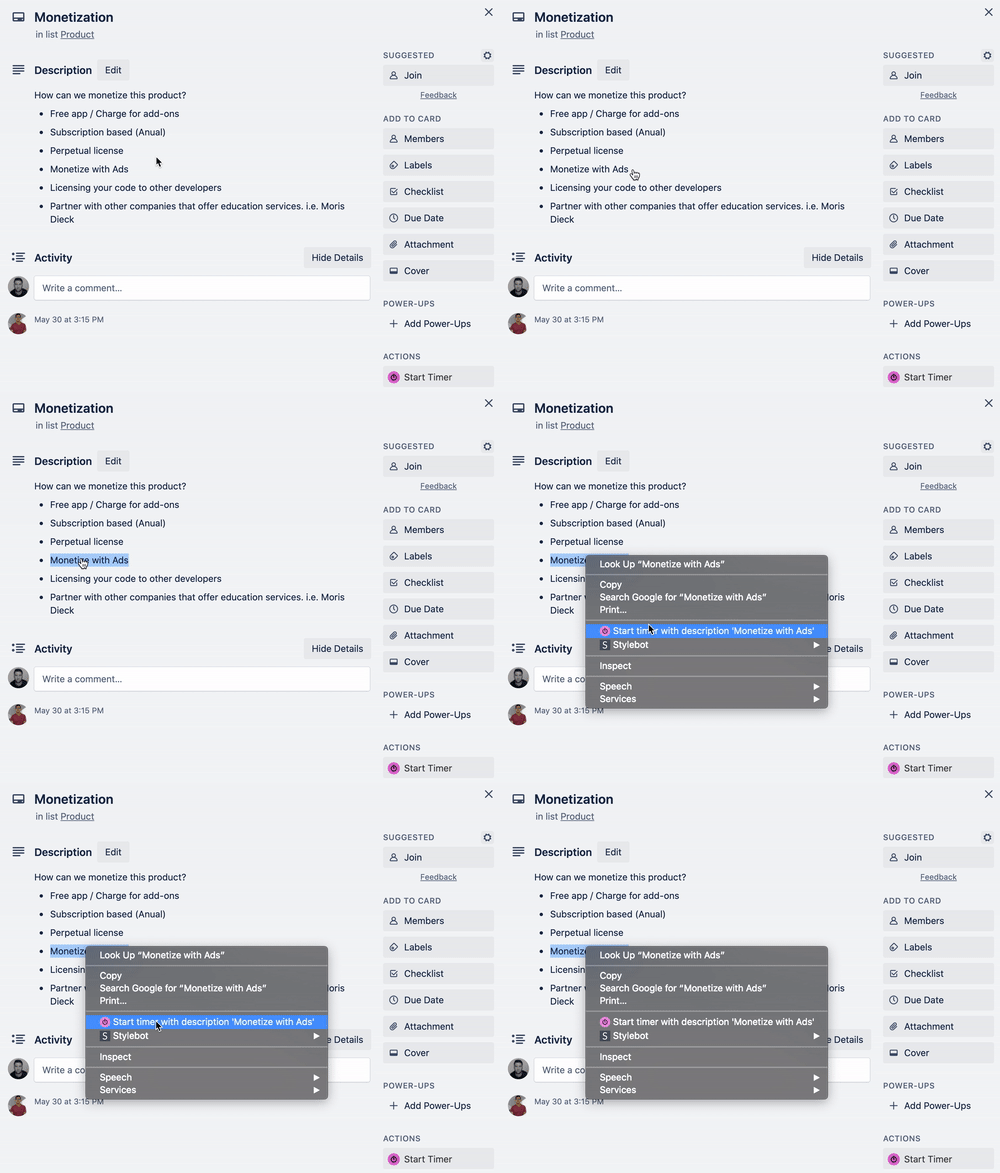
The above example is from Trello, but the feature works with any text inside the browser, which means you can get quite creative with it:
Toggl Track browser extension Settings
To access settings, click on the Toggl Track browser extension icon inside the address bar and then click the cogwheel icon in the top right corner of the popup.
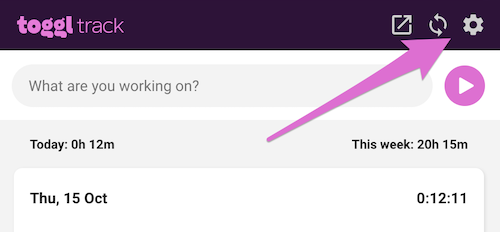
1. Integrations
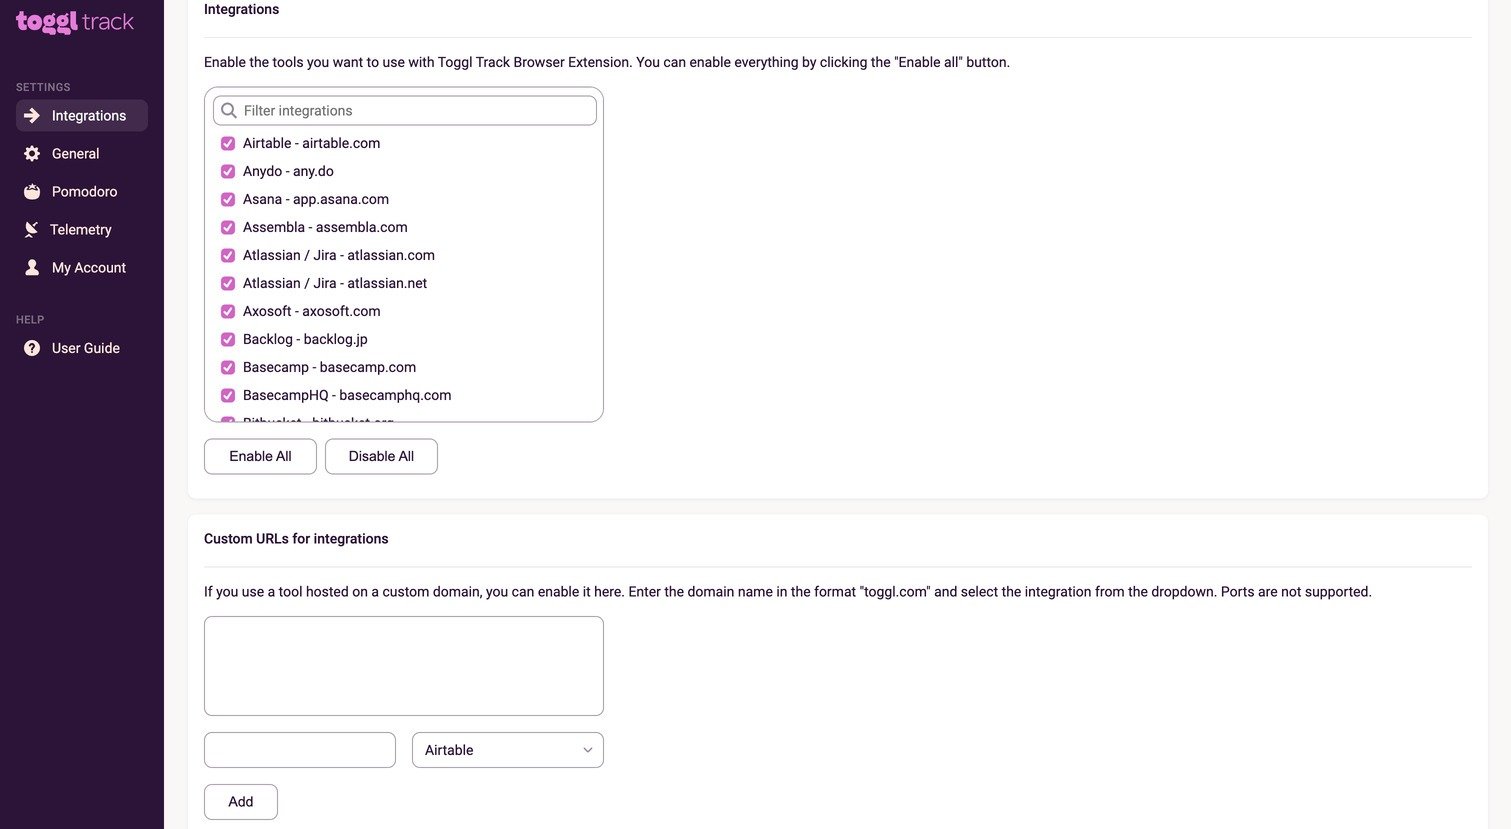
Under Integrations settings, you can enable the apps in which you would like to see the Toggl Track extension button to start a timer. You can enable or disable all integrations with one click as well as well as setup Auto-track.
To see the location of the Toggl Track button inside various apps, please see this guide. You can find a longer list of apps on the following page as well.
You can also enter custom URLS for integrations, if you are using a tool hosted on a custom domain.
Note: When tracking time by clicking the Toggl Track button in another app, we will match the Project name (if a matching one exists in Track), and add any tags and description from the webapp you're using as well. We do not add tasks, these can be added manually.
2. General

The General tab has a lot of basic settings.
Projects Settings
-
Set a default project to track time to
-
Choose to remember the last chosen project or not
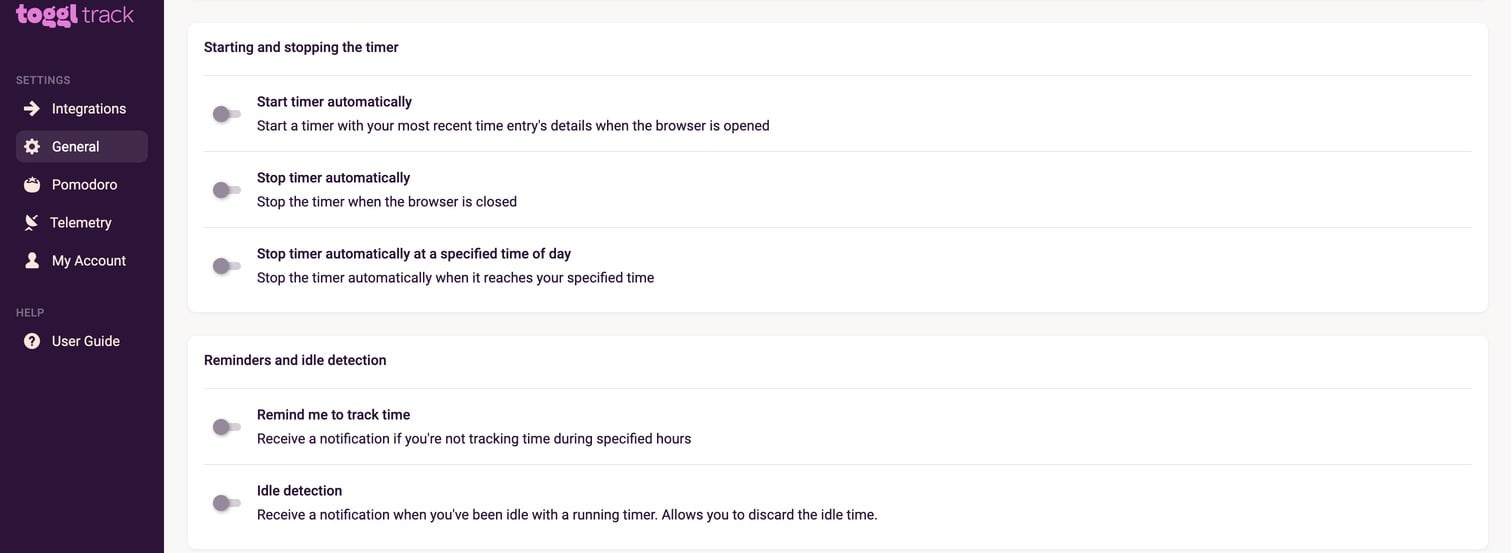
Starting and stopping the timer
-
Start timer automatically when browser is opened
-
Stop timer automatically when the browser is closed. Note, this will not work if the browser is force-quit, the system shuts down, or a similar abrupt closure happens and this setting does not apply to Pomodoro timers.
-
Stop timer automatically at a specific time of day
Reminders and idle detection
-
Set a reminder to track time during specified hours of the day. You can define the time frame when this is active (e.g. your work hours) and the length of time necessary to trigger a reminder. The notification to track time will look like this.

-
Setup idle detection so you are notified when the timer has been running while you've been idle. You can also discard the idle time. Idle tracking notifications will look like this.

Clicking the close icon in the corner will keep the idle time and let the time entry continue.
Clicking “Discard idle time” will stop the time entry and remove the idle time from it.
Selecting “Discard idle and continue” will remove the idle time from the entry but continue tracking.
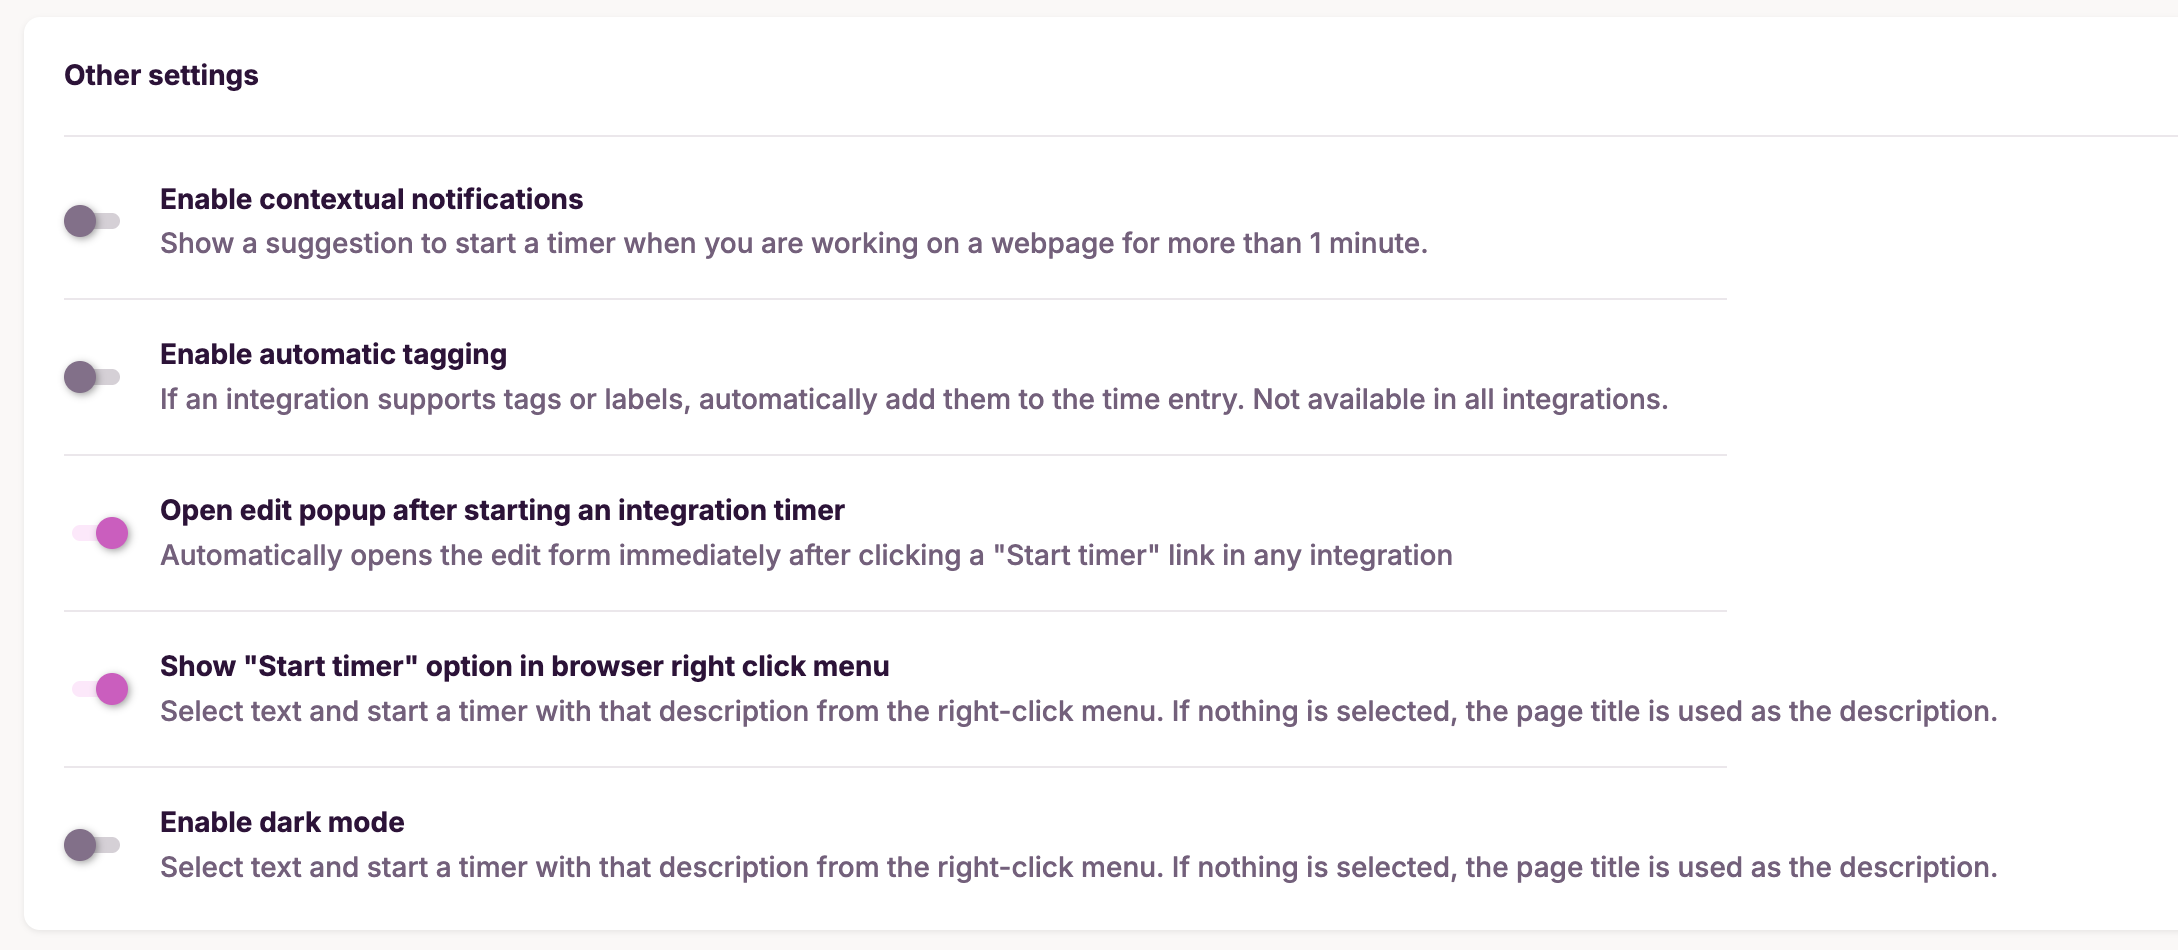
Other settings
-
Enable contextual notifications.
-
Enable automatic tagging of tags or labels if the integration supports it.
Note: These include: Asana, Bitrix24, Eventum, Freshdesk, Gitea, Gitlab, Google-keep, Helprace, Kantree, Meistertask, Todoist, Workast, Workflowy, Zammad.
-
Open edit popup when you start a timer via an integration
-
Show "start timer" option in right-click menu in browser
-
Enable dark mode

You can also choose to Clear Cache or Reset all settings to default on this page.
3. Pomodoro
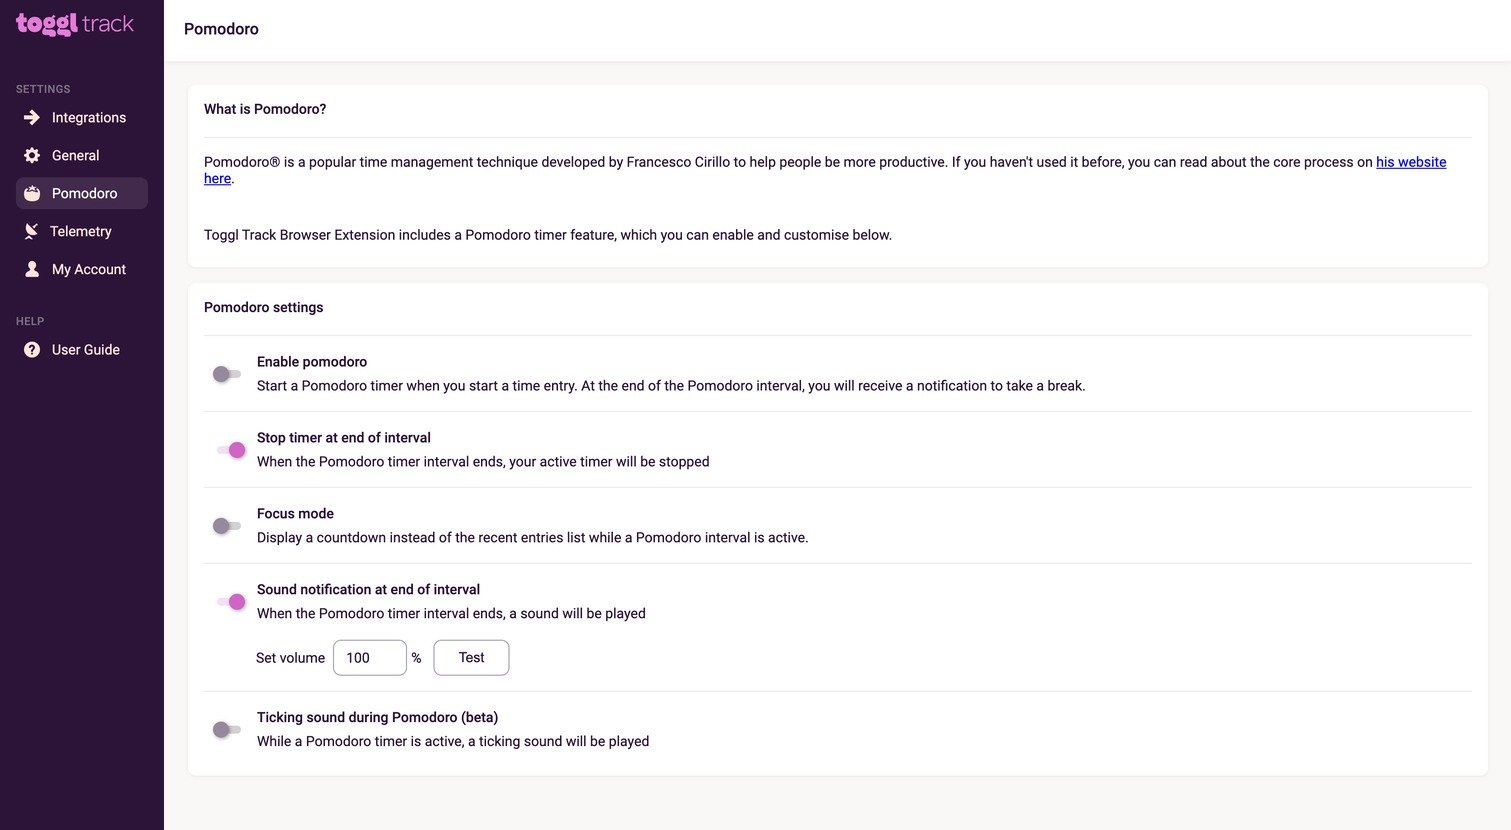
With the Pomodoro Timer you can set up notifications that will let you know that it’s time to take a break.
On this tab you can:
-
Enable pomodoro
-
Enable the setting to stop timer at the end of each interval
-
Enable focus mode
-
Enable sound notifications at end of interval
-
Enable a ticking sound during the Pomodoro interval
Here is what a Pomodoro notification looks like.

Once you’re done with your break you can select to continue the last entry or start a new one.
4. Telemetry

You can choose whether we receive usage statistics and error reports on this tab. Read more about what data the app stores here.
5. My Account
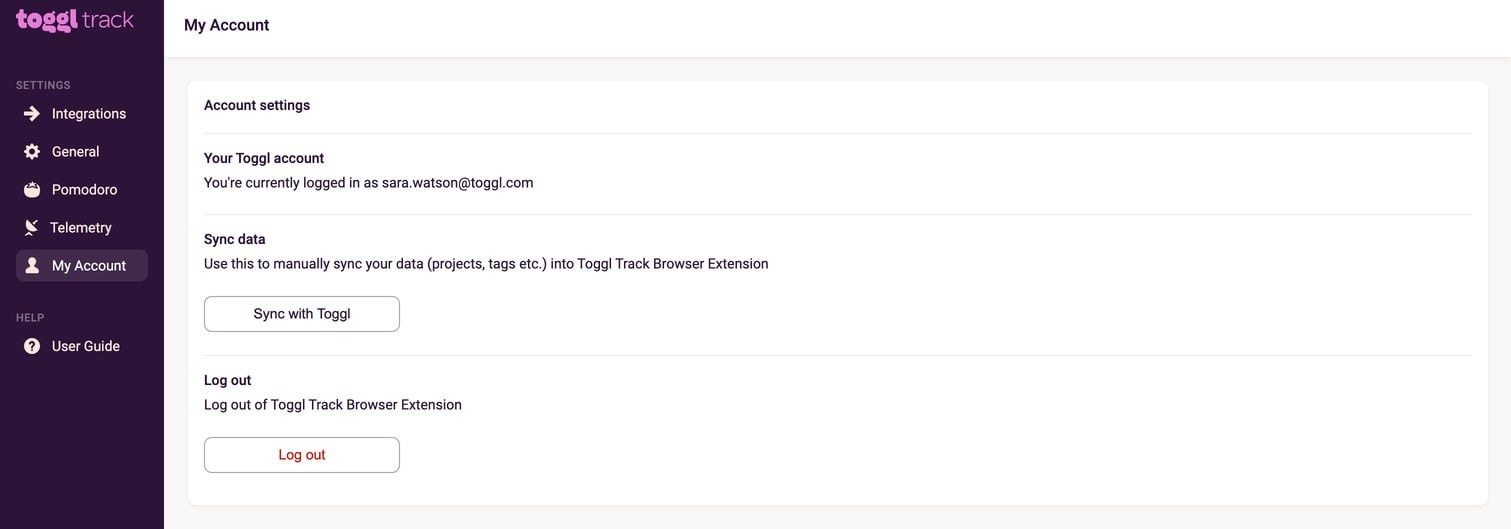
This tab shows you the account you are logged in with, and options to sync data with Toggl or Logout.
Shortcuts
Use Ctrl + Shift + E to create a new time entry.
Extension keyboard shortcuts can be customized in the following places:
-
Chrome: chrome://extensions/shortcuts
-
Firefox: Instructions for Firefox
How Can I Get My Favorite Tool Added?
Message us via the chat button in the bottom right corner and tell us about the tool you want to be integrated with the Toggl Track browser extension.
Where did the feature of adding custom Integrations go?
We recently had to perform a mandatory update to our Browser Extensions (both at Chrome Web Store and Firefox Browser Add-ons) in order to comply with Manifest v3. Manifest v3 is currently not supporting custom scripts on the user's side.
We acknowledge this is an important limitation for the Track Extension and we are coordinating with Google Chrome and Mozilla Firefox support to provide us with an alternative solution as soon as possible.
Why can't I log in to the extension?
It's possible your previous session ended in such a way that is preventing a new login session from occurring. To fix this:
-
Open the "Extensions" page in Chrome/Firefox.
-
Click to view extension details for the Toggl Track extension.
-
Locate a link to Extension options.
-
Navigate to "My account" in the left sidebar.
-
Click on "Log out".
How does Auto-track work?
Once enabled, Auto Tracker feature allows you to automatically track time on your desired pages. You can choose which pages to track and set a duration for how long you need to stay on the page before tracking begins. If you choose, Auto Tracker will automatically stop tracking your time when you close the tab or browser.
How To Enable Auto Tracker
Step 1
-
Navigate to the Toggl Extension Settings
-
Enable
Enable auto tracker to stop time entries on tab close -
Update the time (in seconds) that you need to spend on the page before you would like the auto tracker to start tracking your time.
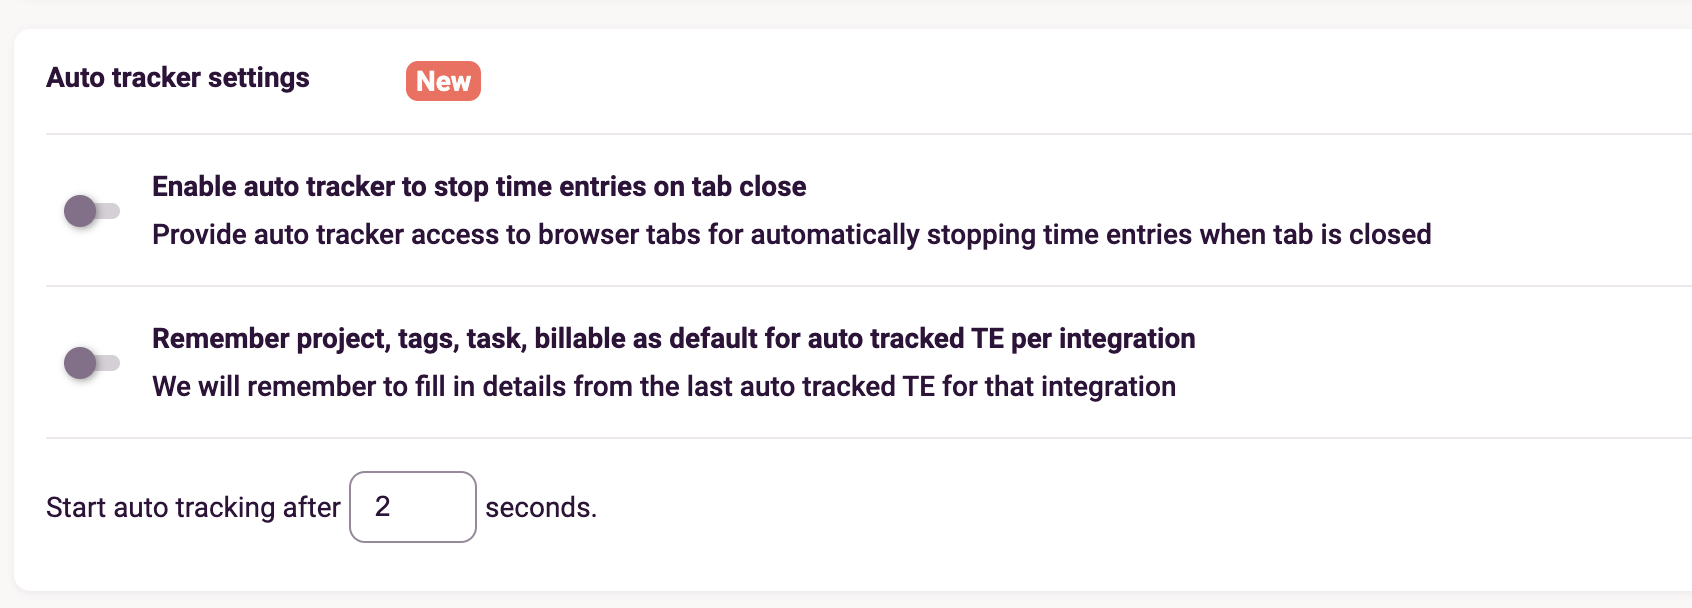
You can make the process more seamless by enabling Remember project, tags, task, billable as default for auto tracked TE per integration We will remember to fill in details from the last auto tracked TE for that integrationthis will remember the previous project/ tags / tasks that you used in the last time entry on that page.
Step 2
Above the Auto Tracker Settings, you will see the integrations settings. Ensure you tick the Auto track check box of the desired integration you would like to track.