Creating Projects
Projects (and clients) are key for organizing time entries in Toggl Track. By assigning your time entries to projects (and then to clients), you can easily make reports and look over your time-tracking data in your workspace.
How can I create a project?
There are two ways you can create a project. You can create projects using the "Projects" page via the Toggl Track web app or on the fly while creating a Time Entry
In Toggl Track, a Client can have many Projects, but each Project can only have one Client. So, if you don’t typically work on an assignment/project basis, but want to keep track of the services that you provide, consider entering your clients’ names as Projects.
Creating projects using the "Projects" page
- Click the Projects tab on the menu bar located on the left side, as shown in the screenshot below:
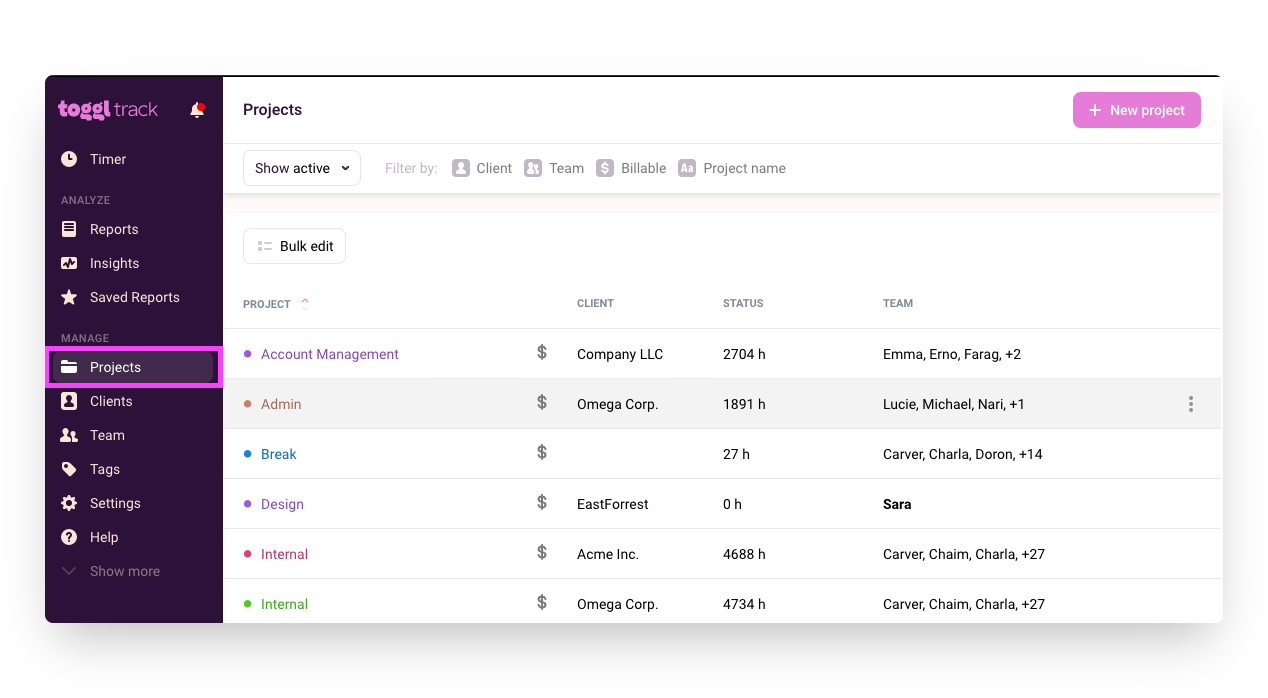
- Click on the “+ New Project” button in the top right corner.
- A popup window will appear allowing you to enter a project name, and get started.
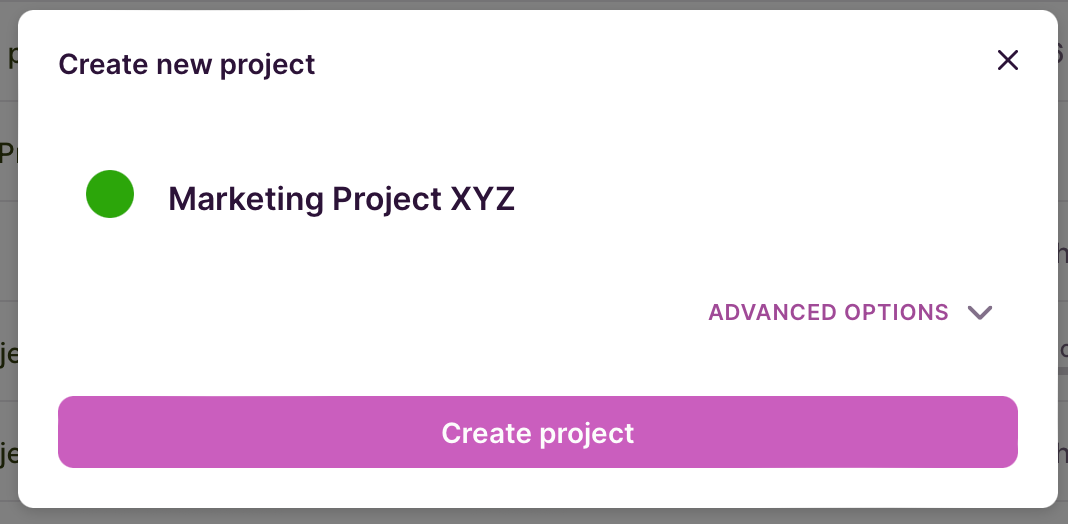
To add more details, click Advanced Options, where you can then: 
- Apply a Project Template
- Select a client you wish to be associated with that project,
- Set it to Private or Public
- Project Start and End Date
- Set the project to be recurring,
- Set project estimates,
- Add billable rates,
- Add a fixed fee rate,
- Choose which workspace this project belongs to.
- Click Create Project when done to Save.
Note: While Free plans can choose from 14 available Project colors, paid plans can pick any color from a HEX code color picker.
A Project will not be archived or deleted on its end date. However, if it is a recurring project, it will stop doing so on the end date.
Creating projects while creating a new Time Entry
You can create time entries in manual mode or using the timer mode (a live running timer).
- Click on the "folder" icon to get a drop-down list of projects and start typing the name of your new project.
- The drop-down list of suggestions will try to suggest a matching (existing) project name as you type. If you type a project name that does not exist you will be offered the option to create a new project.
- At this point, with the name of your new project typed into the search field, you can either click on the "+ Create new project" button with your mouse pointer or use a keyboard shortcut Ctrl+Enter / Cmd+Enter to create a new project.
Useful tips for creating projects
Adjust the default project visibility
Open the Workspace Settings page and define whether new projects should be Private or Public by default. Open this article for more details on access rights and project privacy settings.
Viewing all projects
You can view all created projects by clicking on the Projects tab on the left side menu using the Toggl Track web app. On the Projects page, clicking on Project or Client column headers will sort the list for you by that entity.
Moving data between workspaces with projects
You can move your data between Workspaces by choosing another Project label. When editing time entries on the Detailed Reports page pick a Project from another Workspace, to move your time entry to that Workspace. This feature is also available with Bulk Edit.
Using project templates for faster creation of projects
Users on paid plans can create new projects faster by using the Project Template feature.
Selecting who can create projects (and clients)
Admins on paid plans can prevent regular users from creating a Project by going to Workspace settings
Updated on: 06/16/2026
Thank you!